[Instructions on how to submit your files using the Orientation Builder are further down on this page. This first section discusses the use of images in your Online Orientations in general.]
There are 2 formats in which you may
submit your
Online Orientations with or without images: PDF and HTML. If you use
HTML and your Welcome Statement or Syllabus also includes images, then
the other format is JPG for the image--although there are options here
depending on the type of graphic (GIF and PNG for example).
To submit your Online Orientation using PDF, you simply convert your document, be it in .doc, .html, or any other format--to PDF, using Adobe Acrobat or any other PDF maker application. This capability, by the way, for those of you who work on Macs, is built into OS X. Simply print the document and choose "Save as PDF". The graphics in the resulting PDF document are embedded, so there are no additional steps required, other than submitting the Welcome Statement or Syllabus to the Orientation Builder. If you need access to software for PDF creation or conversion, you can visit our faculty workstation or your nearest CIC.
HTML
The advantage of using HTML is that the student does not need any kind of plug-in or add-on to view your content. It is well worth the effort. The same is true for your course content in WebCT. After you do it once, it will be a breeze thereafter.
To submit your Online Orientations as HTML, you will need to create or convert your document to HTML. Unless you prefer to code by hand, it's advisable to use an HTML Editor. There are several free ones out there, such as Composer (a part of Netscape 7 or Mozilla) for ease of use. If using either the Mozilla Suite, now called "SeaMonkey", or Netscape 7, you can find Composer under the Window menu. There are many tools you can employ to achieve the same end, so for the sake of simplicity, we will look at how it's done in Composer. The same principles of apply regardless of the program you are using.
Place the HTML file and its images in the same directory or folder! When the image is linked to the page you are making, be it the Syllabus or the Welcome, it should already exist in the same directory as the HTML file. Just because your HTML editor correctly displays the image does not mean it is correctly linked for the purposes of the Orientation Builder. It is a matter of location as well as proper source code, which is done for your by the HTML editor.
For your images, it's advisable to use JPG for photos and GIF or PNG for graphics like banners or illustrations. Avoid formats like TIFF or BMP.
The following screen captures are provided to assist you. Keep in mind, while this is using Composer, the same principle applies if you use something else.
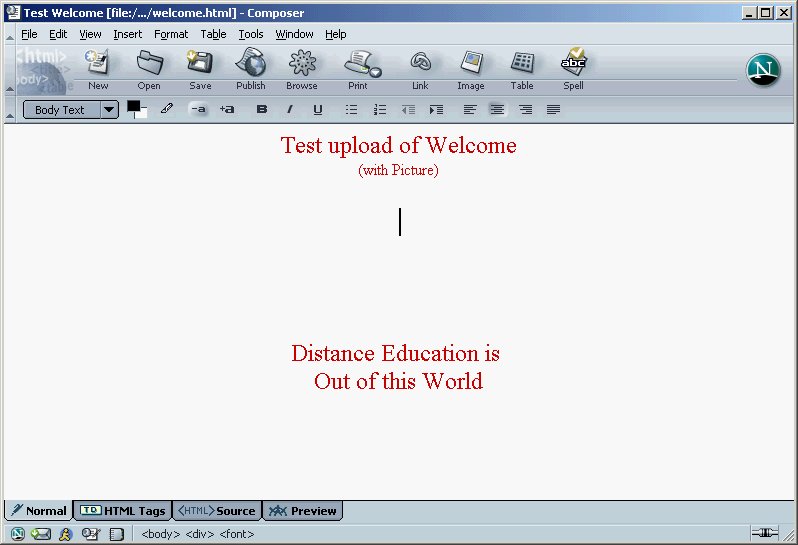
Figure 2 shows that in the directory called "sameplewelcome", we have 2 files: The .html file and the .jpg file, which is the image. Notice they are in the same directory, not in separate directories. It is not enough if the image file is located in its own folder inside the "samplewelcome" directory. It is also not sufficient to simply drag and drop or copy and paste an image to the directory where the HTML document resides. Your image name and location has to be linked in the html code.
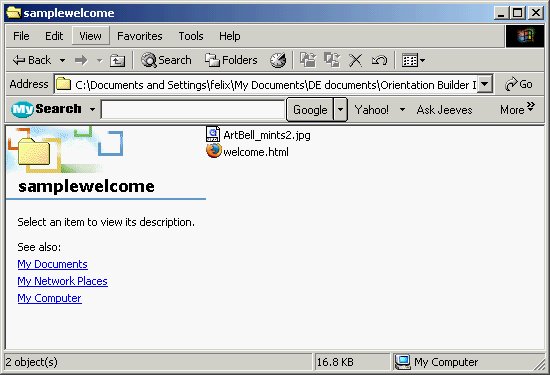
Figure 2
Figure 3 shows the Dialog Box that you get when you click on "Image". Here you will click on "Choose File..." in order to browse for you file. Figure 4 shows that we have located our .jpg file in the "samplewelcome" folder. Double-click on it, or select with your mouse and click "Open".
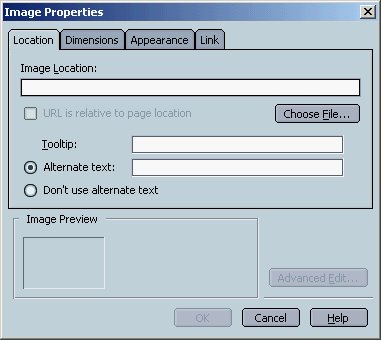
Figure 3
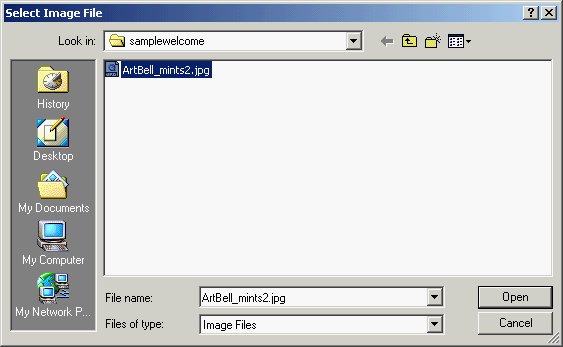
Figure 4

Figure 5
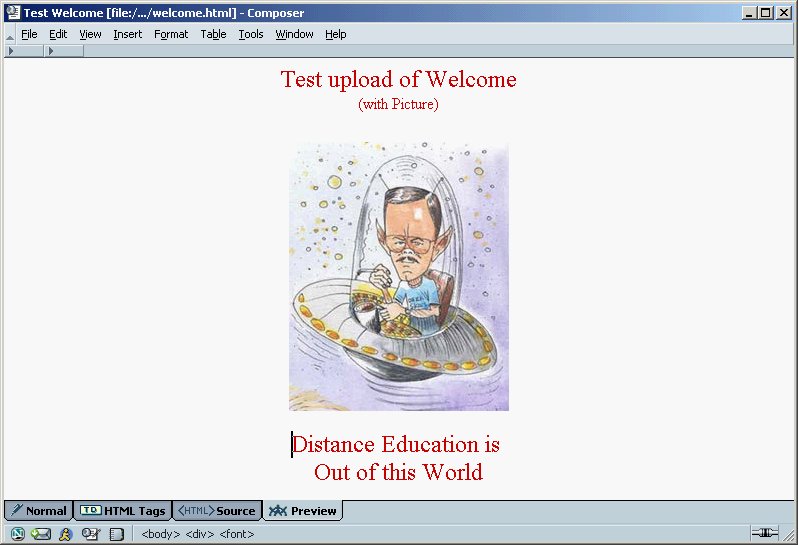
Figure 6
PDF
To submit your Online Orientation using PDF, you simply convert your document, be it in .doc, .html, or any other format--to PDF, using Adobe Acrobat or any other PDF maker application. This capability, by the way, for those of you who work on Macs, is built into OS X. Simply print the document and choose "Save as PDF". The graphics in the resulting PDF document are embedded, so there are no additional steps required, other than submitting the Welcome Statement or Syllabus to the Orientation Builder. If you need access to software for PDF creation or conversion, you can visit our faculty workstation or your nearest CIC.
A
Word on MS Word and other Formats
If you have a MS
Word file that you want to use for your Welcome or Syllabus, you will
need to convert it to .html by selecting "Save As" in Word and
selecting "Web Page" as the format. Additionally, if you are
using Word 2000, you may need to run that file through Microsoft's
Office HTML Filter 2.0. If you are using a campus
workstation, it may already be installed. Look for it in
Start>Programs>Microsoft Office Tools. If you are using
Word 2003, in the Save As window, use the "Web Page, Filtered" option.
Also, be aware that MS-Word will not place the HTML document and the images in the same folder or directory. You will need to re-edit the html with an html editor, after you have moved the images to the same directory as the HTML document.
Also, be aware that MS-Word will not place the HTML document and the images in the same folder or directory. You will need to re-edit the html with an html editor, after you have moved the images to the same directory as the HTML document.
HTML
The advantage of using HTML is that the student does not need any kind of plug-in or add-on to view your content. It is well worth the effort. The same is true for your course content in WebCT. After you do it once, it will be a breeze thereafter.
To submit your Online Orientations as HTML, you will need to create or convert your document to HTML. Unless you prefer to code by hand, it's advisable to use an HTML Editor. There are several free ones out there, such as Composer (a part of Netscape 7 or Mozilla) for ease of use. If using either the Mozilla Suite, now called "SeaMonkey", or Netscape 7, you can find Composer under the Window menu. There are many tools you can employ to achieve the same end, so for the sake of simplicity, we will look at how it's done in Composer. The same principles of apply regardless of the program you are using.
The main thing to remember is:
Place the HTML file and its images in the same directory or folder! When the image is linked to the page you are making, be it the Syllabus or the Welcome, it should already exist in the same directory as the HTML file. Just because your HTML editor correctly displays the image does not mean it is correctly linked for the purposes of the Orientation Builder. It is a matter of location as well as proper source code, which is done for your by the HTML editor.
For your images, it's advisable to use JPG for photos and GIF or PNG for graphics like banners or illustrations. Avoid formats like TIFF or BMP.
The following screen captures are provided to assist you. Keep in mind, while this is using Composer, the same principle applies if you use something else.
Figure 1 shows the web page that we have
thus far created and saved in Composer. The filename is
"welcome". (Composer will add the .html extension
automatically.) I have created a space where I want the image. I
have also
selected the "Align Center" in the Format Toolbar because I want my
image centered. A WYSIWYG HTML Editor will allow you to edit much
in the same way as a word processor like Microsoft word would. To
insert the image into the document,
click on "Image" in the toolbar.
Figure 1
Figure 2 shows that in the directory called "sameplewelcome", we have 2 files: The .html file and the .jpg file, which is the image. Notice they are in the same directory, not in separate directories. It is not enough if the image file is located in its own folder inside the "samplewelcome" directory. It is also not sufficient to simply drag and drop or copy and paste an image to the directory where the HTML document resides. Your image name and location has to be linked in the html code.
Figure 2
Figure 3 shows the Dialog Box that you get when you click on "Image". Here you will click on "Choose File..." in order to browse for you file. Figure 4 shows that we have located our .jpg file in the "samplewelcome" folder. Double-click on it, or select with your mouse and click "Open".
Figure 3
Figure 4
After we have browsed for the image,
make sure the "URL is relative to page location" check box is
checked. See Figure 5. You can add alternate text if you
wish. The student will see this text if he cannot load the image
for some reason. Click "OK" when you're done.
Figure 5
In Figure 6, We now have a Welcome page
that uses an image. It is properly linked and the location of the files
is correct for our use, as we have seen. A note on image file
size:
You will not want to use a very large file
because it will take too long to download for students using dial-up to
access the course. It's advisable that you keep the file size of
your
image to well below 200k. As for the dimensions of the image, if you
want to shrink or expand them inside of a program like Composer, simply
click once on the image, place
the cursor over one of the corners, and when it becomes a diagonal
arrow, click and drag to re-size. This will not change the file
size--only the dimensions. To resize a large image file, use an image
editor like Photoshop Elements. There are even free ones
available on the Internet. After saving our document, it is ready
to submit it to the Orientation Builder.
Figure 6
Submitting
Your Images to the Orientation Builder
Back to the Top
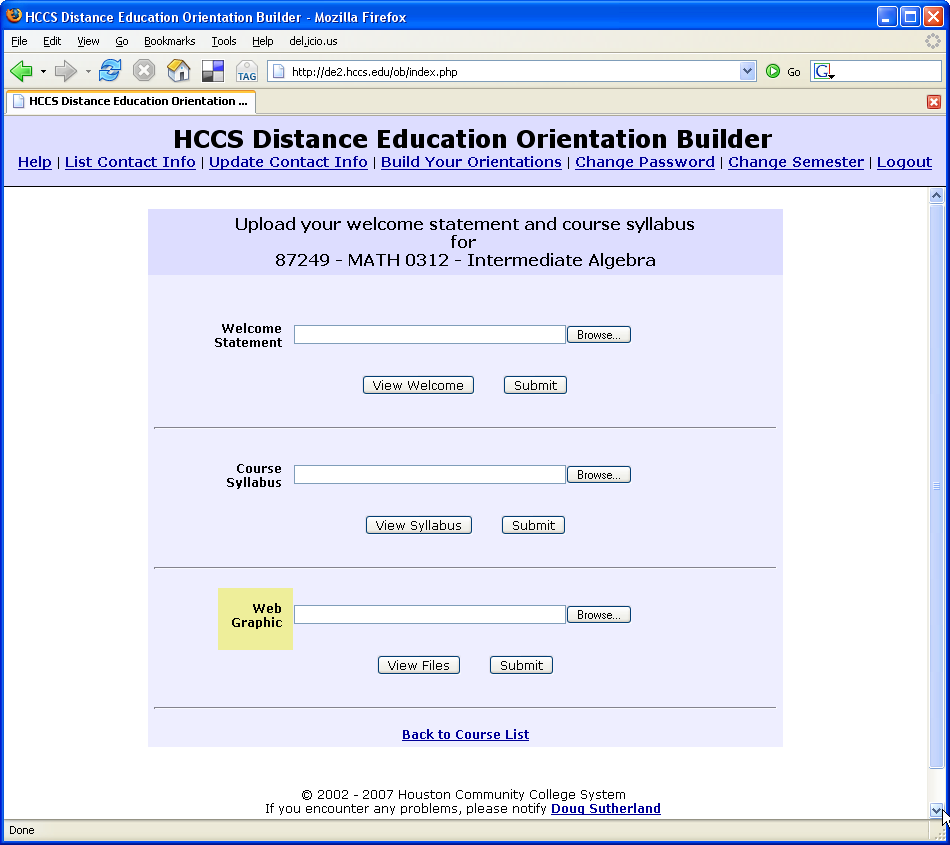
Figure 7
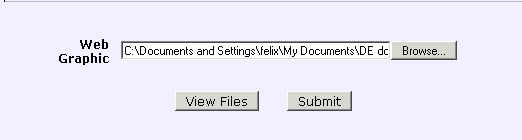
Figure 8
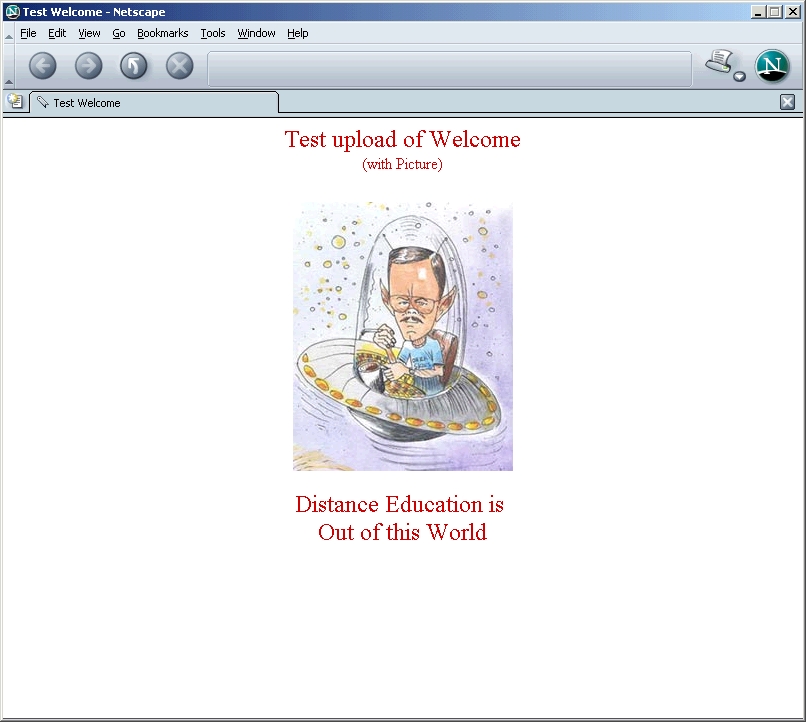
Figure 10
The Distance Education team will then make your orientation "live" for the students to access in a timely manner. If it you notice it has not been made live on the Orientation Picker Page (the "Yellow Page"), and it's been more than 24 hours since you submitted and within the time frame of when students should be able to access it, kindly remind us at desupport@hccs.edu .
Back to the Top
Back to the Top
Click the CRN for each Online
Orientation that you want to submit or resubmit. You are
probably familiar with the following screen:
Figure 7
After submitting the HTML documents,
whether it be the Welcome or Syllabus, it is time to submit your images
using the "Web Graphic" portion of the
Builder page.
Simply click the Browse button in the Web Graphic section to browse
your hard
drive or removable media for your images for that section. You
will know that the Orientation Builder has properly
"found" the items if the empty field get automatically filled with a
path name for the file like this:
Figure 8
Click Submit for each item that you are
submitting. You will browse for, select, and submit one file at a
time, one CRN at a time. When you are done, click on "Back to Course
List". You can
view your online orientation by clicking on the "Online" link for each completed Orientation.
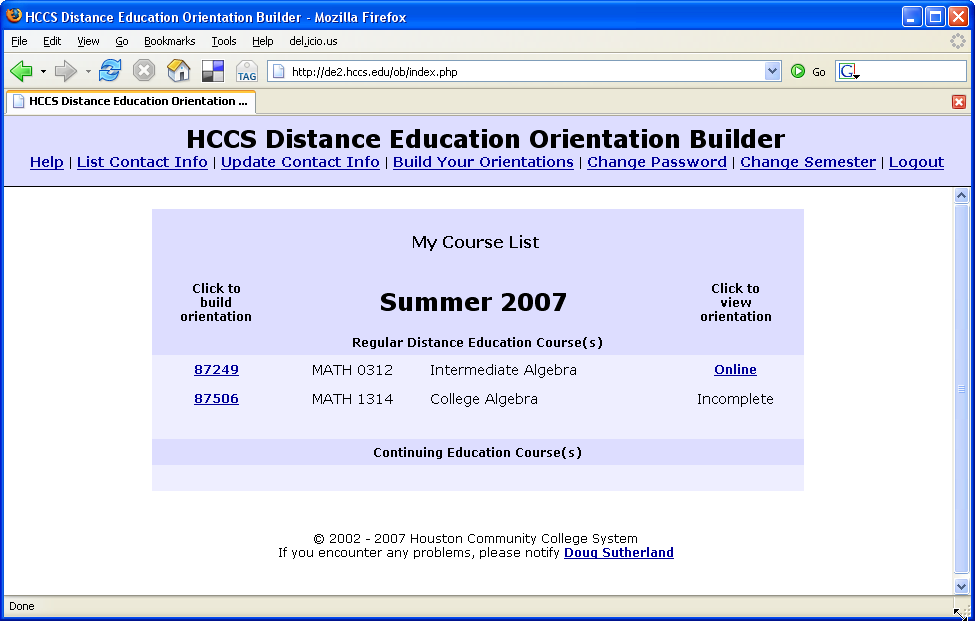
Figure 9
Figure 9
Here is a successfully submitted sample
Welcome Page with an image:
Figure 10
The Distance Education team will then make your orientation "live" for the students to access in a timely manner. If it you notice it has not been made live on the Orientation Picker Page (the "Yellow Page"), and it's been more than 24 hours since you submitted and within the time frame of when students should be able to access it, kindly remind us at desupport@hccs.edu .
Back to the Top